


Photo by Adi Goldstein on Unsplash
Day 7: NodeJS - Serving Files via ExpressJS & Creating a simple Web Server


In the previous article, we saw what advantages ExpressJS offers as compared to the normal approach while serving. In the normal approach, we need to explicitly check everything in the controller but as compared to ExpressJS, things were drastically different. In today's blog, we will try to serve HTML files via ExpressJS.
In the normal approach, while serving the HTML page, we need to create a stream and attach it to the pipe. Later on, we would pass that as a response. But while using ExpressJS, all we need to do is use the sendFile() function.
app.get('/', (req, res) =>{
// res.send('This is a Home Page') // This is what we did in previous article
    res.sendFile(__dirname+'/index.html')    // Serving an HTML page
})
The moment you commit this change, you will be seeing an HTML page you created. Earlier, we were just sending simple texts but now we are directly presenting the page.
A Simple Web Server Project
We will try to implement a simple web server that uses ExpressJS concepts. We will also work with the "package.json" file as well as the "dotenv". Follow this guide step by step to create this web project.
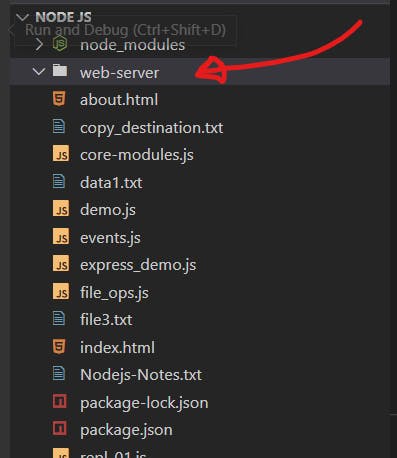
Let's start by creating a folder in your workspace. I have named in "web-server" in my case. You may name it according to your wish.
After you create this project folder, the first step is to create a "package.json" file inside it. To do so, simply type "npm init". It will walk you through the process and ask for some small details.
A "Package.json" is our dependency management file. It is very crucial at times, especially if you are working with npm. Whatever dependencies our application has, it will be mentioned in "the package.json"
Now let's install ExpressJS.
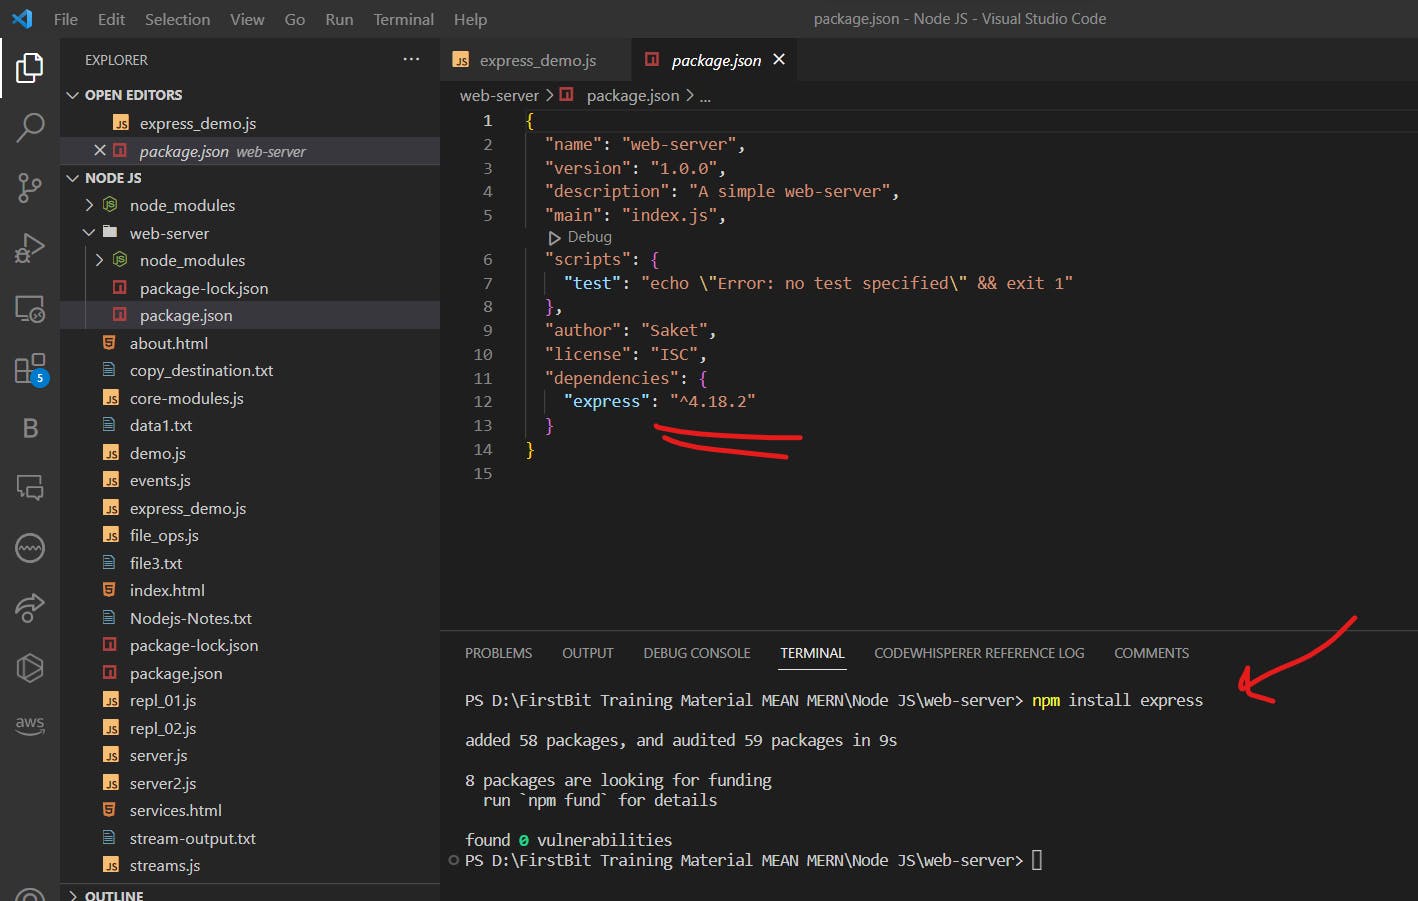
You can see the changes in our "package.json" file. After installing express via npm, it immediately added "express" in the dependencies section. We will be making use of ExpressJS so this is very important. The above result as shown in the image signifies that ExpressJS has been installed in your workspace.
After the express is installed via npm, it gives us a "node_modules" folder and a "package-lock.json" file. We usually do not mess around with the "package-lock.json". This file contains dependencies of the dependencies that we are going to use in our project. In case we need anything to add, do it "package.json".
Our next step is to install "dotenv".
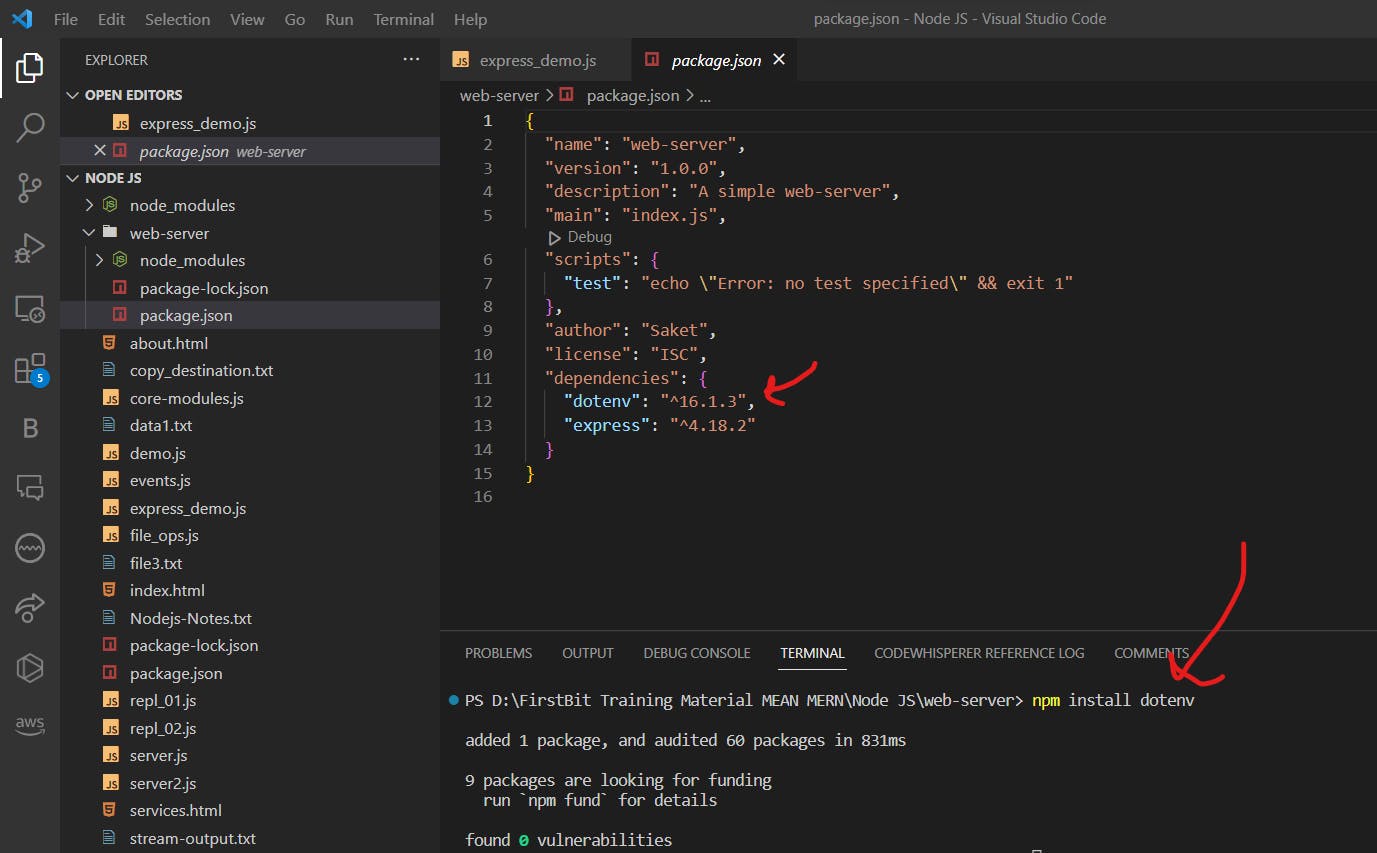
This "dotenv" will be useful for working with environment variables. As you can see it's a dependency being added, we can assure you that dotenv is installed.
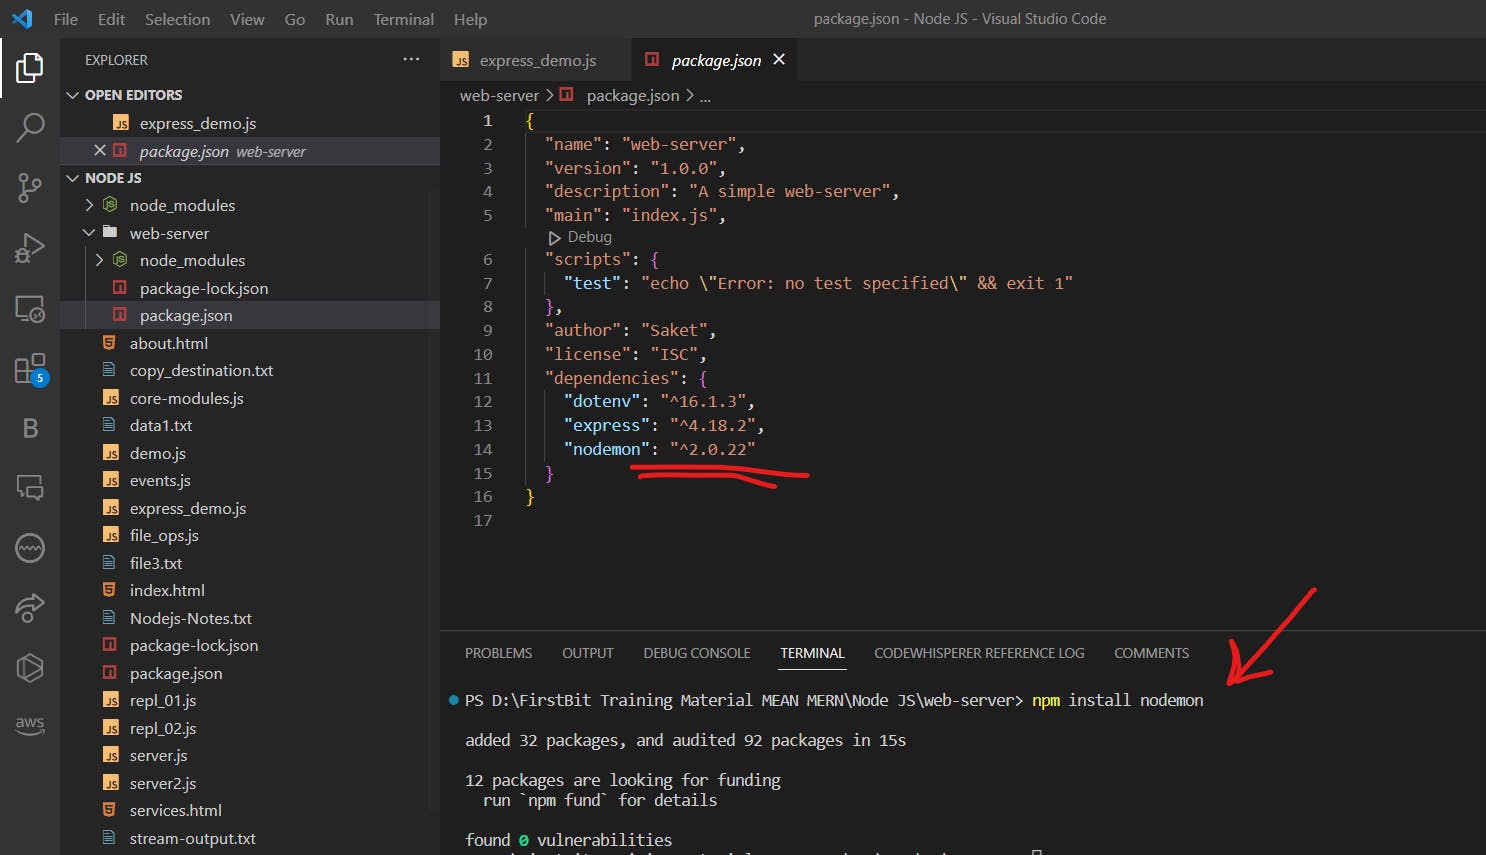
Now we are going to install "nodemon". This is a special tool in which we don't have to restart the server every time we commit changes. It will continuously watch our server and automatically it will restart the server, giving us a quick output. In other words, we don't have to restart the server for every change we do, nodemon will do it for us.
These were our requirements which are now installed. Now let's code.
Create a new file in your folder. Let us call it "app.js". Also, we will create an unnamed file ".env". Now we will look at how to use environment variables.
// These are the contents of ".env" file
port = 4444
host = localhost
// These are the contents of app.js
require('dotenv').config()

console.log(process.env.port)
console.log(process.env.host)
When you run this code, you will see...
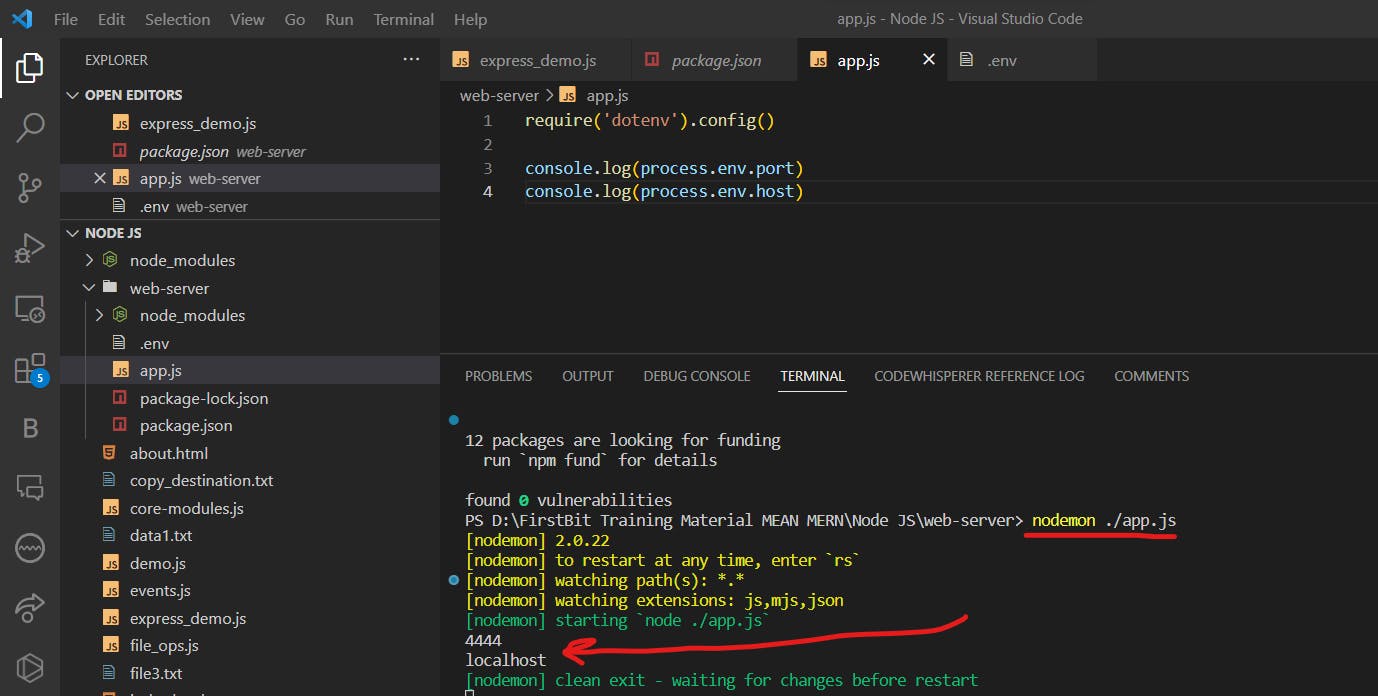
So as you can see, we are able to access the environment variables. Now let us look at the full code.

By looking at the code, can you figure out on what port the code will be running? Every variable is taken from the ".env" file. The big advantage it offers is that in case we need to change an environment variable, then only by changing the values in the ".env" file, it will work. We don't have to change each and every value in the code, thus saving us a lot of time.
Sometimes developers may change some values in the core program and it may cause big problems in the code. To avoid such problems, place every variable in the ".env" file and change the value there and then only.
Serving static files using ExpressJS
Static files are files that are stored at some fixed place and do not show any dynamic movements. To serve static files, we use "express.static()"
For now, we will use static files in a demo.
Create a folder structure with the following files as shown in the image.
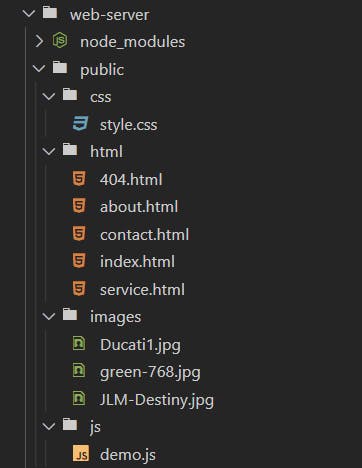
All of these files may contain whatever content you want. Make sure there is ample of it so as to catch the differences when we navigate to different pages. This is the content in my index.html file. Copy the same for others, only changing the h1 content.
<!DOCTYPE html>
<html lang="en">
<head>
    <meta charset="UTF-8">
    <meta http-equiv="X-UA-Compatible" content="IE=edge">
    <meta name="viewport" content="width=device-width, initial-scale=1.0">
    <title>Express Demo</title>
    <link rel="stylesheet" href="../css/style.css">
</head>
<body style="background-color: cyan">
    <h1>Home Page</h1>
    <hr>
    <p>Lorem ipsum dolor sit amet consectetur, adipisicing elit. Dolor soluta, incidunt dicta distinctio placeat in voluptas excepturi voluptates. Corporis, nobis. Sequi nam dignissimos voluptas odit minima commodi fugiat molestias veritatis saepe, consequuntur in facere, voluptate illo necessitatibus, explicabo deserunt iste molestiae libero laudantium fuga magni! Cupiditate, nemo tempore! Autem, saepe.</p>
</body>
</html>
Get some random images. Put them in the images folder.
The CSS for your HTML pages is to be placed in the CSS folder.
h1{
    text-align: center;
    color: blue;
    font-family: cursive;
}
p{
    color: red;
    font-size: 20px;
    font-family: fantasy;
}
Now we need a simple JavaScript file. For starting purposes, I will put this content in it.
function greet(){
    alert('Good day sir!!')
}
Last but not least, here is my main "app.js" file. All we wrote earlier will be used as middleware.
require('dotenv').config()
const express = require('express')
const app = express()

// console.log(process.env.port)
// console.log(process.env.host)

const port = process.env.port
const host = process.env.host

app.use(express.static(__dirname+'/public'))   // Redirecting to middleware
// My all the above middleware data is in the folder named "public"

app.get('/', (req, res) =>{
    res.send('ExpressJS works!!!')
})

app.get('/service', (req, res) =>{
    res.send('This is a Service Page')
})
app.get('/about', (req, res) =>{
    res.send('This is a About Page')
})
app.get('/contact', (req, res) =>{
    res.send('This is a Contact Page')
})

// Wildcard routing
app.get('*', (req, res) =>{
    res.send('Page not found')
})

app.listen(port, () =>{
    console.log(`Server started on http://${host}:${port}`)
})
Now here the magic begins. If I go to my browser and type the path to a folder named "HTML", notice the output.

This is the output of the "index.html" file we created. Even if there are multiple pages, the "index.html" will be considered as the default one. Let's try navigating to some other page.
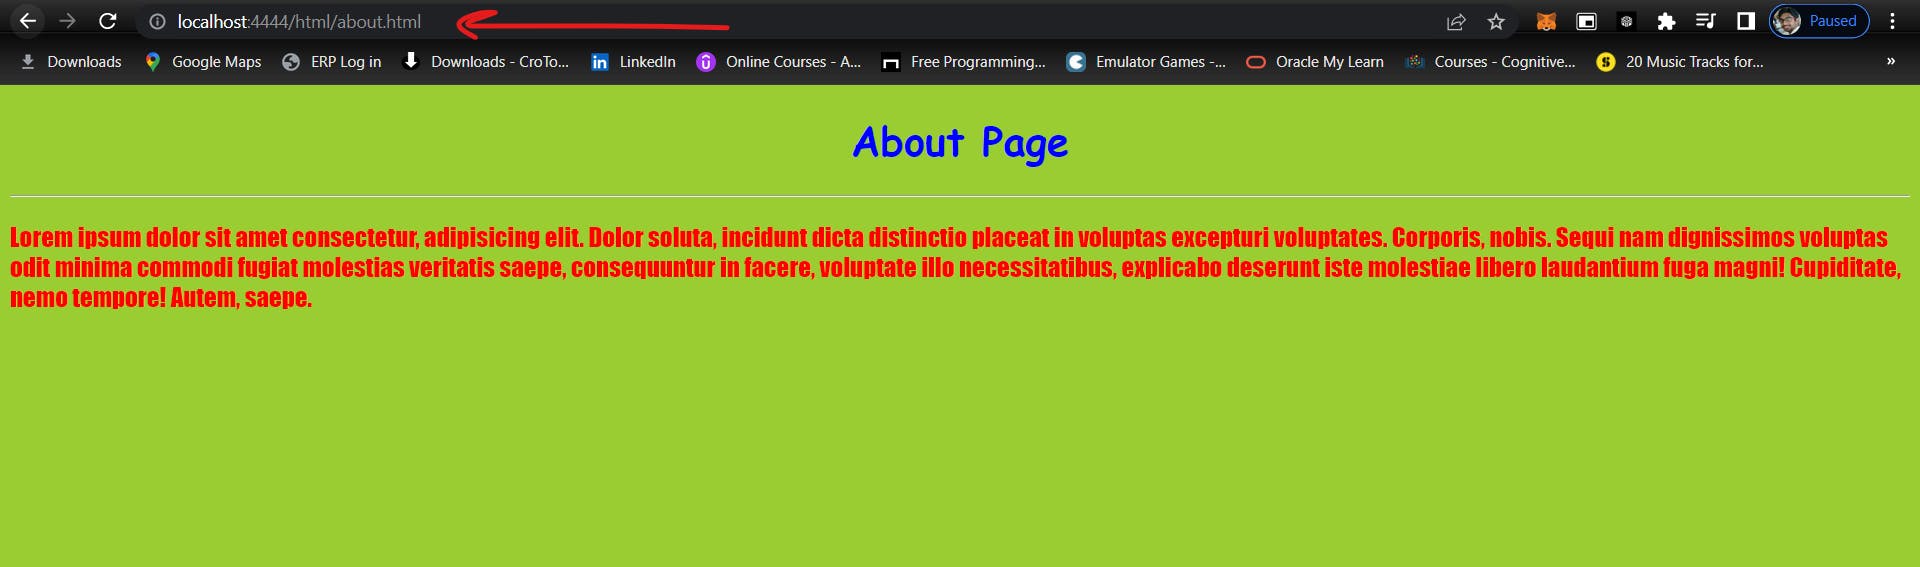
Now if we wanted to navigate to some other page, we needed to specify as seen in the above image. These are the static contents that we are currently serving to the user via ExpressJS. What if we want to show some images?
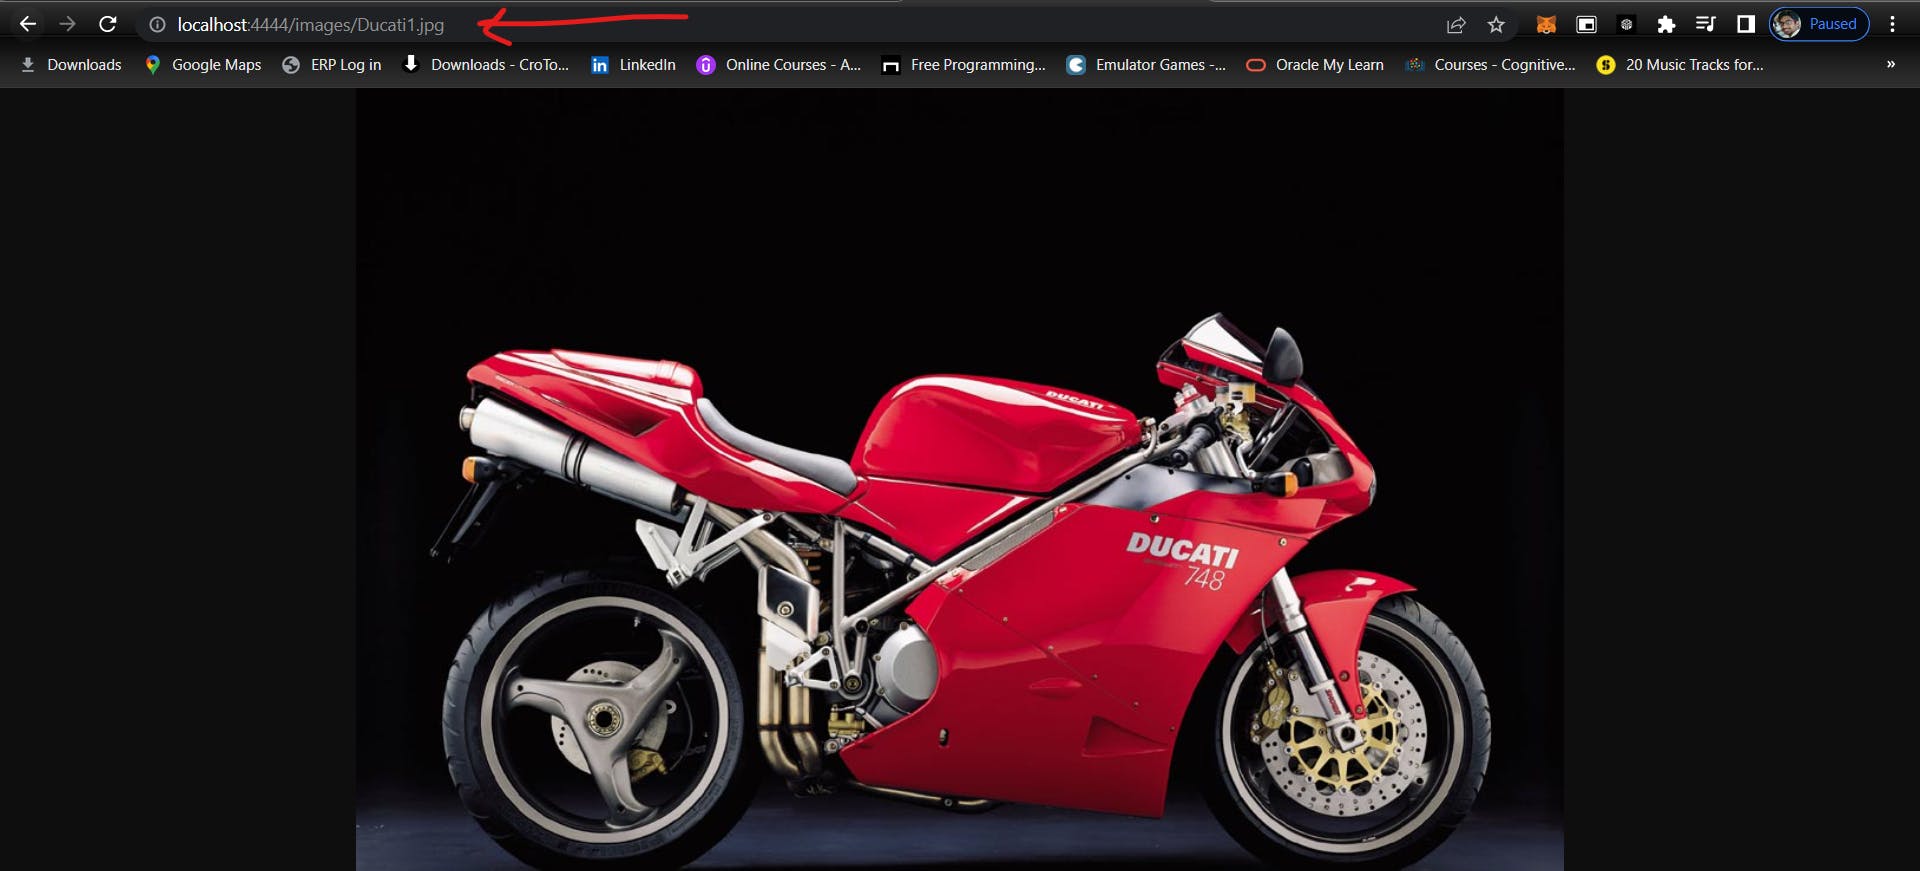
It also works. So as you can see, we have clearly served static content. The URL which we can see above, can be accessible anywhere if we store the static contents at some location.
Thus we created our own little web server using ExpressJS.
That's all for today. I will be back with more coding tomorrow.