Day 5: NodeJS - http Module & Working with Streams

Developer based in India. Passionate learner and blogger. All blogs are basically Notes of Tech Learning Journey.
Till now, we have been using JSON servers for data gathering as well as for the use of databases. But what if we want to create our server? When we are discussing NodeJS, the "backend" is the thing that immediately comes into mind. So we will use the http module's help to create our server and then use it in our project.
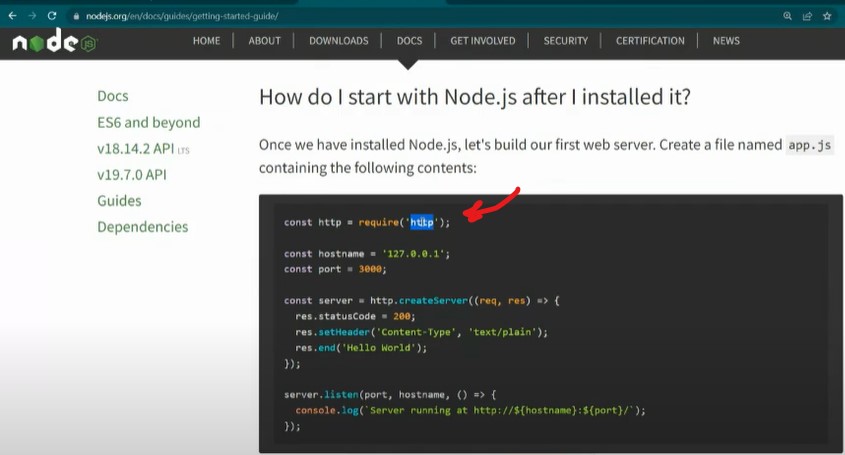
This "HTTP" is a core module. The fun part is, when we navigate to how to start with NodeJS, the first example they will show you is of the http module. This is how you will "Create your own server using NodeJS". To summarize the above code, we can write:
Import the http module
Create the server using the .createServer() method
Starting listening to incoming requests using .listen()
Let us try creating our own web server with NodeJS.
// To demonstrate http server

const http = require('http');

const server = http.createServer((req,res)=>{
    res.write("Welcome to this work environment 😉")   // Will be visible to user beacuse it will be printed on client side
    res.end("Hope you will enjoy development")
})

server.listen(5555,()=>{
    console.log("Server started at port 5555")   // When server runs, it will be printed on server side; will not be visible to user of the site
})

Any time you want to inflict some changes in this text, we need to write the updated code in "res.write()" and then we just have to shut off the server from the command line followed by starting it again and hitting the refresh button.
Let's try the routing example.
// To demonstrate http server

const http = require('http');

const server = http.createServer((req,res)=>{
    // res.write("Welcome to this work environment")   // Will be visible to user beacuse it will be printed on client side
    // res.end("Hope you will enjoy development")
    if(req.url == '/' || req.url == '/home'){
        res.write("<html> <body> Welcome to this work environment. <br/> You are viewing home page </body> </html>")
    }
    else if(req.url == '/about'){
        res.write("This is a development server where you can manage your backend operations. <br/> This is all about me")
    }
    else if(req.url == '/services'){
        res.write("Want to know what I can do. Stay tuned.")
    }
})

server.listen(5555,()=>{
    console.log("Server started at port 5555")   // When server runs, it will be printed on server side; will not be visible to user of the site
})
Take a look at if statements. We will be using request variables to handle and perform accordingly. In the above example, if we type simply "localhost:5555" of "localhost:5555/home", then we will be getting the corresponding statement in "res.write()". Similarly, if we navigate to "localhost:5555/about", we will be getting the statement mentioned.
What's a dotenv?
What is the use of dot env?
Dotenv is a zero-dependency module that loads environment variables from a .env file into process.env*. The dotenv package is a great way to keep passwords, API keys, and other sensitive data out of your code. It allows you to create environment variables in a . env file instead of putting them in your code."*
via Google.
Suppose we want to give our above code to someone else we know. But due to some desktop environment problems, we cannot run it. Also, we cannot share each and every line of code and details as things will get complicated. To simplify, we can create our own environment and share it with the other user.
We will create a ".env" file at first. It is like data that we will store somewhere and load it from anywhere within our big module, instead of writing the data again and again to be used.
Streams
Streams are used to handle large amounts of incoming data. With the usage of a stream, the performance will be good and fast. With the help of the stream, we can create a mechanism through which we can transfer a large amount of data and also handle it effectively.
There are 2 types of streams:
Writable Stream - Used to write data into a stream
Readable Stream - Used to read data from a stream
Here is a classic example of the stream:
const fs = require('fs')

// First way -> We use event handler
const sourceStream = fs.createReadStream(__dirname+"/data1.txt","utf-8")
// data will be taken from here, this is the file we have
const destStream = fs.createWriteStream(__dirname+"/stream-output.txt","utf-8")   // file will be created and data will be copied here

sourceStream.on("data",(chunk) => {
    console.log(chunk)
    destStream.write(chunk)
})

// Using pipes to interact with streams
sourceStream.pipe(destStream)
So the basic two ways to transfer data using streams are either using an event handler or using pipes. With the use of event handlers, we write the data one by one and store it in the form of chunks. Later we write the data all at once. The second way is by using pipes, in which we directly write the data, without the need for some intermediate chunks.
So this way, we practically performed on the basic examples of streams.


