Day 6: NodeJS - Working with Server and Express.js

Developer based in India. Passionate learner and blogger. All blogs are basically Notes of Tech Learning Journey.
The server is what we will serve to the client. As a client, the content on the server is requested and thus it is served at a specific address. For starters, let's directly jump in and try to serve a simple web page using a server. To serve a webpage simply means that whenever a client requests that page, it should be available.
This is a sample index.html file which we will be using as an example.
<!--A Demo HTML page for serving to the server-->
<!DOCTYPE html>
<html lang="en">
<head>
    <meta charset="UTF-8">
    <meta http-equiv="X-UA-Compatible" content="IE=edge">
    <meta name="viewport" content="width=device-width, initial-scale=1.0">
    <title>Document</title>
    <style>
        h2{
            color: red;
            background-color: black;
            text-transform: capitalize;
            text-align: center;
        }
        p{
            color: brown;
            background-color: white;
        }
    </style>
</head>
<body>
    <h2>Welcome. This is Home page</h2>
    <hr>
    <p>Lorem ipsum, dolor sit amet consectetur adipisicing elit. A, quas quo exercitationem ea quos atque
    recusandae temporibus nemo, laborum nam quasi, incidunt delectus sequi suscipit. Optio et itaque reiciendis vitae!</p>
    <p>Lorem ipsum, dolor sit amet consectetur adipisicing elit. A, quas quo exercitationem ea quos atque
        recusandae temporibus nemo, laborum nam quasi, incidunt delectus sequi suscipit. Optio et itaque reiciendis vitae!</p>
        <p>Lorem ipsum, dolor sit amet consectetur adipisicing elit. A, quas quo exercitationem ea quos atque
            recusandae temporibus nemo, laborum nam quasi, incidunt delectus sequi suscipit. Optio et itaque reiciendis vitae!</p>
            <p>Lorem ipsum, dolor sit amet consectetur adipisicing elit. A, quas quo exercitationem ea quos atque
                recusandae temporibus nemo, laborum nam quasi, incidunt delectus sequi suscipit. Optio et itaque reiciendis vitae!</p>
                <p>Lorem ipsum, dolor sit amet consectetur adipisicing elit. A, quas quo exercitationem ea quos atque
                    recusandae temporibus nemo, laborum nam quasi, incidunt delectus sequi suscipit. Optio et itaque reiciendis vitae!</p>
</body>
</html>
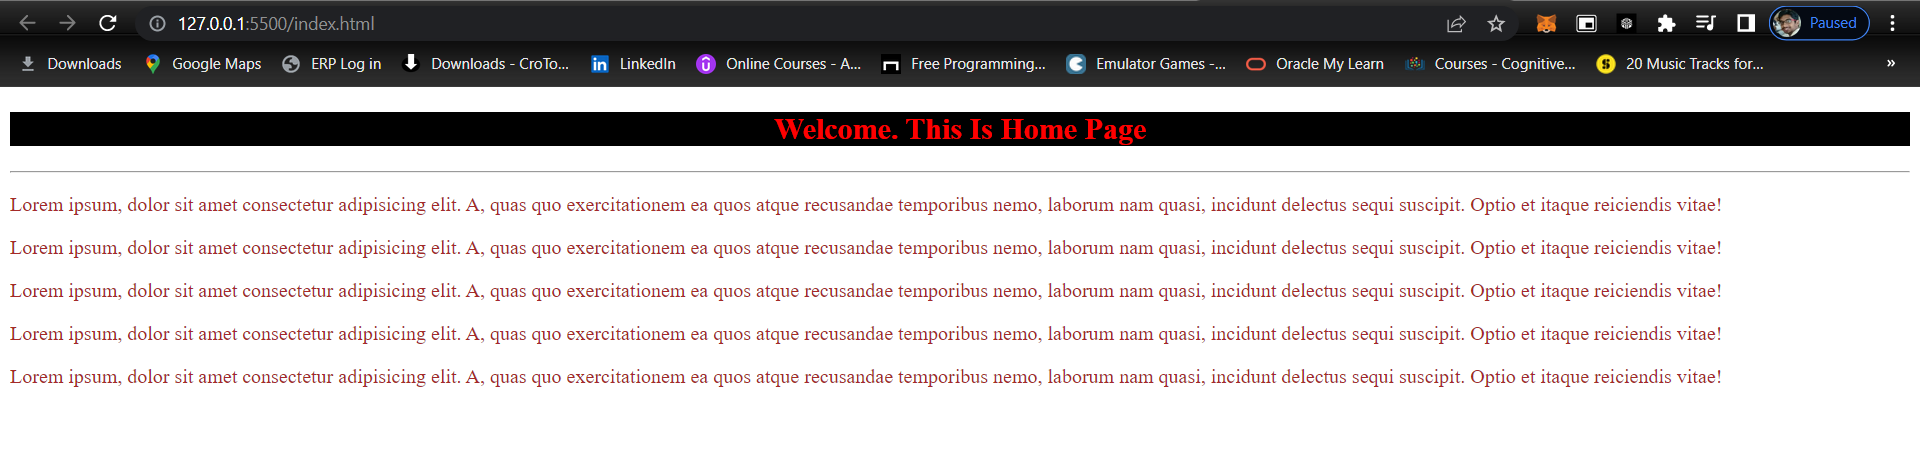
The above image is the output of the upper HTML code. Now we will try to code a JS program in order to serve this page on a particular port.
const http = require('http');
const fs = require('fs');     // fs for finding the index.html file

const server = http.createServer((req,res)=>{
    if(req.url == '/' || req.url == '/home'){
        res.setHeader('content-type', 'text/html');
        res.statusCode = 200;
       const stream = fs.createReadStream(__dirname + "/index.html",'utf-8');   // For stream to be displayed, we are taking it from our index.html
        stream.pipe(res);  // Output what you read
    }
})

server.listen(2222, () => {    // In my case, I am listening on port 2222
    console.log("Listening on http://localhost:2222");
})
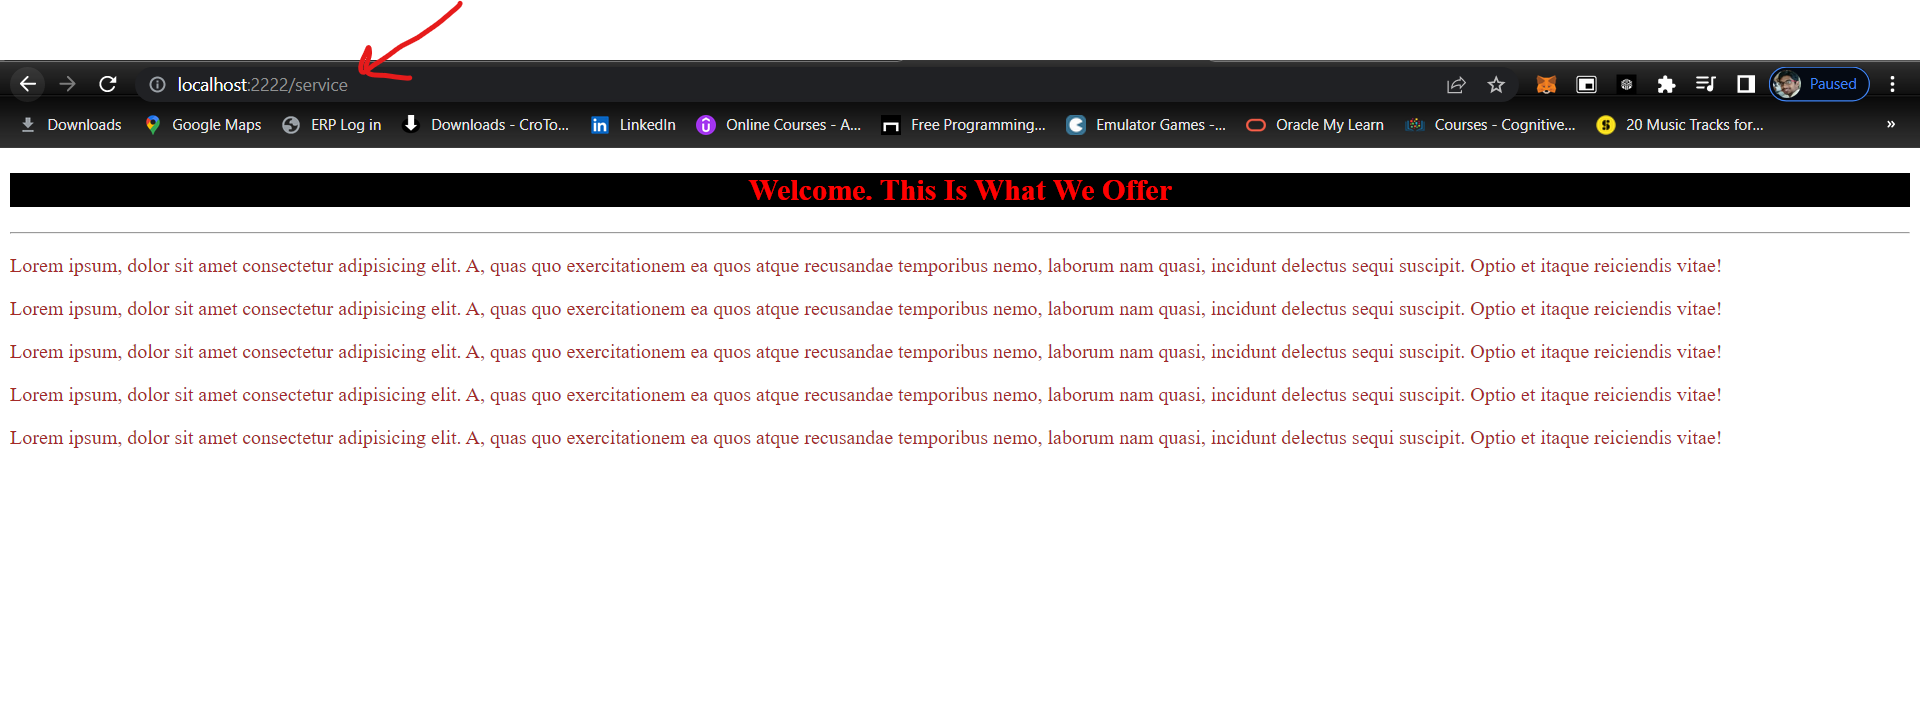
After running the above code, we get:

Notice the change in URL compared to the previous screenshot and this one. This page is presented by the server to us on the specified port. But in this example, we are handling only two routing cases. One is '/' and the second is '/home'. What if we want to show some other page too? We will code for it shortly.
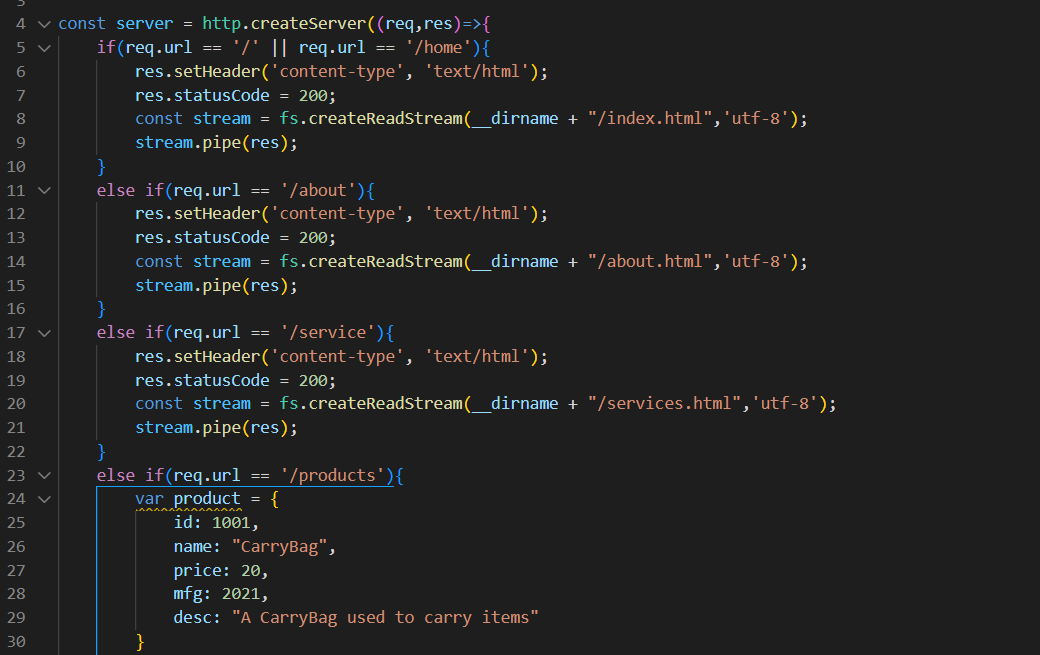
To achieve so, we will be creating more web pages such as "About" (about.html) and "Services" (services.html). We will need to make use of "else if" here to achieve this routing mechanism.
// This whole part is also refered to as "Controller". Rememebr this for later part as it may be useful
const server = http.createServer((req,res)=>{
// SHOW HOME PAGE BY DEFAULT (Same as code above)
    if(req.url == '/' || req.url == '/home'){
        res.setHeader('content-type', 'text/html');
        res.statusCode = 200;
        const stream = fs.createReadStream(__dirname + "/index.html",'utf-8');
        stream.pipe(res);
    }
// SHOW ABOUT PAGE
    else if(req.url == '/about'){
        res.setHeader('content-type', 'text/html');
        res.statusCode = 200;
        const stream = fs.createReadStream(__dirname + "/about.html",'utf-8');
        stream.pipe(res);
    }
// SHOW SERVICES PAGE
    else if(req.url == '/service'){
        res.setHeader('content-type', 'text/html');
        res.statusCode = 200;
        const stream = fs.createReadStream(__dirname + "/services.html",'utf-8');
        stream.pipe(res);
    }
})
Let's test it. So whenever we specify the string according to "req.url" the page will be displayed as we coded. In our cases, we take the example of the services page.
So this is how we serve the pages. We are reading the data and sending it back. Remember, this data is in the form of bytes. This flow of data occurs via Streams.
Sometimes there happens to be a need to convert JSON objects into strings and vice versa. In the example provided below, we use the JSON variable to make it in the form of strings.
else if(req.url == '/products'){
// JSON Variable
        var product = {
            id: 1001,
            name: "CarryBag",
            price: 20,
            mfg: 2021,
            desc: "A CarryBag used to carry items"
        }
// No more writing after res.end is allowed
        res.end(JSON.stringify(product));
// If we write only product, then it will fetch us nothing, We need to convert this JSON object into String
    }
Using the above method, we can convert our JSON object into a string. To do the opposite, we use "JSON.parse()" to convert a string into a JSON object.
ExpressJS
Suppose that data is traveling from client to server. Inside the server, there is our application code. Inside the application code, there is a piece of code that is referred to as the "Controller". The piece of code as shown in the image is the Controller, as it handles the client requests.
Here comes our issue, once the flow of data from client to server gets to the controller, then there is no turning back. Sometimes the data is not processed fully and it goes towards the controller. For that, we need something called "Middleware", which will take the incoming requests, process them fully and then pass them to the controller. The Middleware resides between the incoming requests and the controller.
So why do we need a middleware, it is so because sometimes we need to put some validations or corrections on the code before we hand it down to the controller for final display. Just like the controller, Middleware too is full of functions, which might be useful in performing a few operations. After the execution of Middleware functions, it is the responsibility of that Middleware to call the "next()" method, so that control passes down ultimately to the controller.

We can also write multiple Middlewares. For example, if Middleware 1 completes its work, it should call the "next()" method so that Middleware 2 gets to work and so on till the code function reaches the controller. After the execution of the controller, there is no next() method, it will send the final response.
" Express is a Fast, unopinionated, minimalist, web framework for NodeJs"
We will be using ExpressJS to implement the concept of Middleware.
To install ExpressJS, we type
npm install express
To use ExpressJS, we need to import it using the "require" keyword.
const express = require('express');
const app = express(); // Creates an Express application. The express() function is a top-level function exported by the express module.
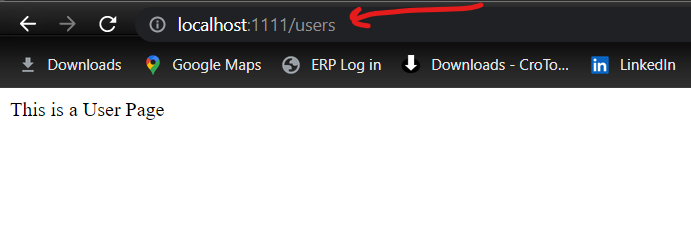
Now let's do the same thing we did earlier. You will notice a drastic change.
// The so called "CONTROLLER"
app.get('/', (req, res) =>{
    res.send('This is a Home Page')
})
app.get('/users', (req, res) =>{
    res.send('This is a User Page')
})
app.listen(1111, () =>{
    console.log('Express-Server started at port 1111')
})

As you can see, it directly gave away the response, as compared to earlier code, we had to write too much code for it. Take a look at another example of the same code output:
You can see we handled the routing part very well. Let us try to write some middleware.
I will try to write a middleware that logs data into some files. For now, we will not be implementing that actually though but only we will try to print on the console to show that it works.
// Logger middleware
function logger(req,res,next){
    console.log('Request Received....' + req.url);
    next()
}
But is it enough, no. We need to specify a command in order to use this middleware.
app.use(logger); // To inform to use logger middleware we created
When we write this statement, our logger middleware works. After its execution, the command will be passed to Controller via the "next()" function.
Similarly, I have written another middleware for authentication. Now have a look at the complete code:
const express = require('express');    // Get reference to express function
const app = express();             // call express function to create an application

app.use(logger);  // To inform to use logger middleware we created
app.use(authentictor)

// Logger middleware
function logger(req,res,next){
    console.log('Request Received....' + req.url);
    next()
}

// Authenticator middleware
function authentictor(req, res, next){
    console.log('Request Authentication....')
    next()
}

// The so called "CONTROLLER"
app.get('/', (req, res) =>{
    res.send('This is a Home Page')
})
app.get('/users', (req, res) =>{
    res.send('This is a User Page')
})
app.listen(1111, () =>{
    console.log('Express-Server started at port 1111')
})
After running this code on localhost, we can see the following output on our console, indicating that our middleware works.

Thus we used ExpressJS and tried it as middleware. We will be using it more later on.


